Measuring angles

Get it right with your right angles in this easy measurement guide!
Christina Levandowski

Author
Christina Levandowski

jill padfield

Expert Reviewer
Jill Padfield

Published: January 2024

Measuring angles

Get it right with your right angles in this easy measurement guide!

Christina Levandowski

Author
Christina Levandowski

jill padfield

Expert Reviewer
Jill Padfield

Published: January 2024

Measuring angles

Get it right with your right angles in this easy measurement guide! 

Christina Levandowski

Author
Christina Levandowski

jill padfield

Expert Reviewer
Jill Padfield

Published: January 2024

Key takeaways

  • We measure angles in degrees – Just like you’d use centimeters to measure length on a ruler, we use degrees when we measure angles.
  • You’ll need special tools – To measure angles correctly, you’ll need a protractor. You can get these from any big box store or office supply. 
  • Sometimes radians might be used in place of degrees – You might be asked to use radians as your unit of measurement instead of degrees, so pay careful attention to your assignment directions! 

Learning how to measure angles is one of the most important skills you’ll learn to prepare you for geometry and higher-level math classes. It’s simple to do once you’ve got the right tools and know-how — and we’re here to walk you through it! 

Here’s our helpful step-by-step guide to measuring angles.

Basic units in angle measurement

Here are some basic terms to keep in mind as you practise measuring angles.

The degree

Students generally will be familiar with the measurable unit of a degree — especially if they’ve had experience setting the temperature on an oven or determining how cold it is outside. 

However, that’s not the type of degree we’re referencing when we say “degree” or “degree angle” when measuring angles. Instead, we’re applying a secondary, separate meaning and using it as a unit of measurement for angles that are measured by a protractor. 

You’ll still use the degree symbol (°), or you can simply write “degrees” after your answer to clarify and finish it.

Unlock unlimited maths questions

Put your learning into practice with fun exercises + games that are proven to boost ability!

The radian

Radians aren’t something most KS2 students are familiar with yet. However, they will run into it later on — so we wanted to mention it here. 

Radians are another unit of measurement that can be used in place of degrees when we measure angles. You’ll use these more in higher-level maths classes and applied maths classes (like physics) — so simply knowing the difference between the two is good enough for now.

Comparison between degrees and radians

You know that degrees and radians are different forms of measurement…but you’re likely wondering: How are they so different? 

While both can be used to measure angles, degrees are slightly more “basic” than radians — they can be measured using a protractor (just like we’d see a centimeter mark on a ruler do). 

Radians are a little more complex of a unit and can do more in higher-level maths. The formal definition states that they represent a ratio, otherwise known as the relationship between two different quantities.

This ratio is then divided by the length of the radius of a shape, which is normally a circle or a circular shape. 

⚠️ There are 2π radians in any circle. You might notice how this corresponds with the formula for the circumference of a circle: C (circumference) = 2πr — where “r” = radius and π is and will always be 3.14.

🎉 Don’t worry about mastering that now, though — you’ll revisit radians later on. For now, let’s focus on learning how to measure using the designation of degrees.

Explore angles with DoodleMaths

DoodleMaths is an award-winning app that’s filled with thousands of questions and games exploring multiplication, division and more!

Designed by teachers, it creates each child a unique work programme tailored to their needs, doubling their progression with just 10 minutes of use a day. Try it for free!

for families

How to measure angles

The first step to a correct calculation is getting accurate measurements on those angles. 

Here’s our helpful how-to for kids, covering instructions for protractor measurement.

Using a protractor

  • Grab your protractor, and give it a quick look. You should identify the midpoint, otherwise known as the middle point of your protractor. This is usually marked with a small dot so it’s easy to see. 

  • Line it all up. Line up your angle in line with the “0” line of your protractor, which can be both on the right (bottom) and left (top) areas of your protractor. You can use either, choosing the one that lines up best with your angle.
    • You might run into “upside-down” angles later on in your maths career. While this guide only focuses on how to measure basic angles you’ll see now, you can look forward to learning how to move your protractor around the angle to get the most accurate measurement later on! 

  • Read off the measurement. You’ll then use the numbers on either side of your protractor’s dividing line to judge the measurement of the angle. You’ll choose whichever value is pointed to by the other ray of the angle that is not aligned with the 0 marker. 

Types of angles

There are many different types of angles you’ll see as you practise measuring angles. Here are a few key types to remember as you practise your measurement: 

Acute angle

Acute angles are angles where the measure of the angle is greater than 0° but less than 90°. These angles will look narrow, like fingers pinching something small. An easy way to remember these is to think that they are small, tiny, and, generally, look “cute.” 
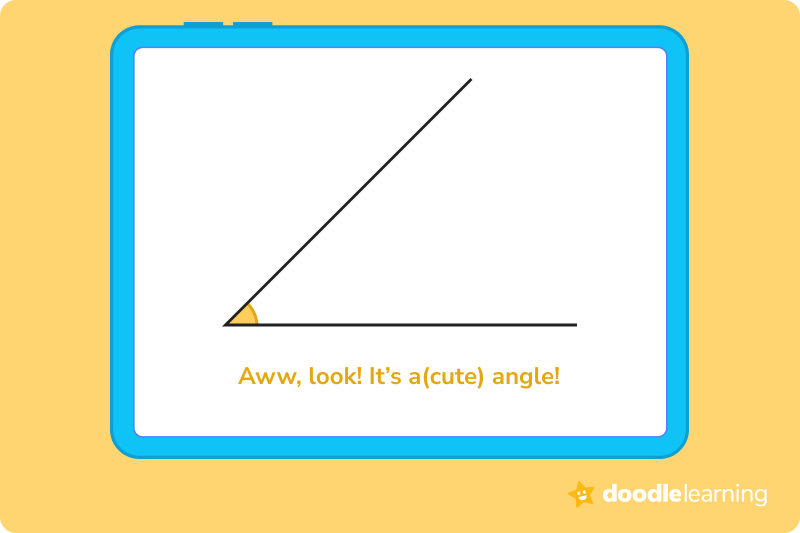
Measuring angles 1

Obtuse angle

An obtuse angle is larger, measuring between 90° and 180°. Think of obtuse angles as large, or looking like “wide-open” mouths ready to chomp on your pencil. 

Measuring angles 2

Right angle

Right angles are mathematically defined as angles that are exactly 90° — no more and no less. You can identify them by their clean, sharp appearance, with the two lines or rays creating a “box like” angle at the vertex, where they meet. 
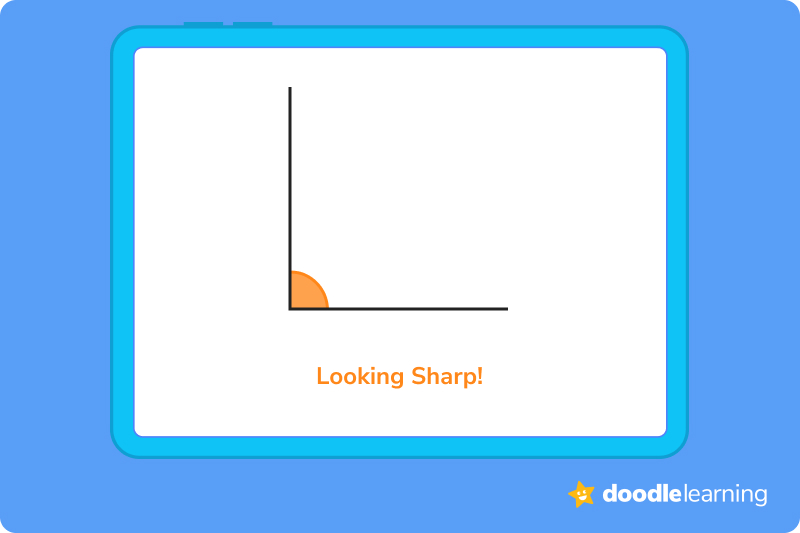
Measuring angles 3

Straight angle

Straight angles are simple — they are defined as angles that are exactly 180°, which means that they’ll look like a straight line on your paper. 
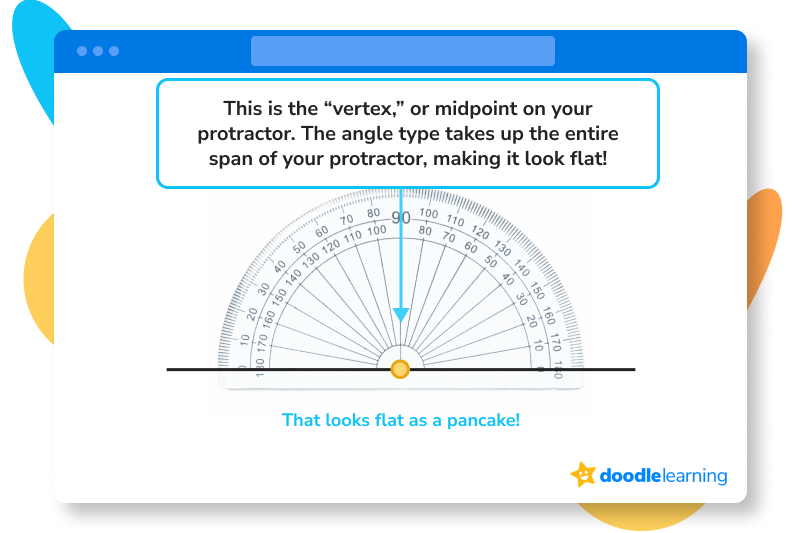
Measuring angles 4

Angles in real life

Angles aren’t just something you’ll see on worksheets or homework packets. They’re actually all around us in our daily lives! Our suggestion is to take an “angle hunt” around your house to see how many you can find. Doing this will help you to easily identify angle types, which is a great starting point for other types of angle measurement later on. You won’t even need an actual protractor to spot them!

Not sure where to start? Here are a few places that likely have angles around your home: 

  • Steps or stairs 
  • Books, binders, or folders 
  • Door frames and doorways 
  • Walls and baseboards 
  • Boxes and packages 
  • Certain foods (like lasagna noodles) 


Go take a quick walk, and see what you can find. Don’t forget to tell yourself “good work” after! 

Let’s practise together!

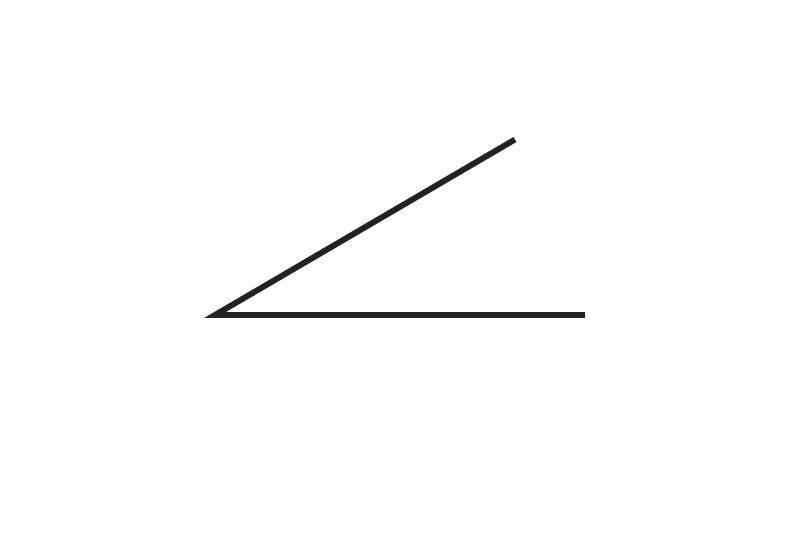
1. Measure the given angle:

Measuring angles 5
  1. Before we begin measuring, we recall angle types. Does this angle match any specific angle (such as a right angle or a straight angle)? 
  2. This angle appears to be a right angle, which is an angle designation that can only be given to angles that have a measurement of 90°.
  3. We check our work, aligning the protractor’s midpoint at the vertex of the angle.
  4. We then align the flat base line of the angle with the “0” mark on the protractor. 
  5. We read the measurement off of the value that the second vertical line is pointing to, which reads 90°. 
  6. We’re done! 

2. Measure the given angle:

Measuring angles 6
  1. Before we begin measuring, we recall angle types. Does this angle match any specific angle (such as a right angle or a straight angle)? 
  2. This angle appears to be a straight angle, which is an angle designation that can only be given to angles that have a measurement of 180°.
  3. We check our work, aligning the protractor’s midpoint at the vertex of the angle.
  4. We then align the flat base line of the angle with the “0” mark on the protractor. 
  5. We read the measurement off of the value that the line is pointing to, which reads 180°. 
  6. We’re done!

3. Measure the given angle:

Measuring angles 7
  1. Before we begin measuring, we recall angle types. Does this angle match any specific angle (such as a right angle or a straight angle)? 
  2. This angle appears to be an acute angle, which is an angle designation that can only be given to angles that have a measurement of less than 90°.
  3. We check our work, aligning the protractor’s midpoint at the vertex of the angle.
  4. We then align the flat base line of the angle with the “0” mark on the protractor. 
  5. We read the measurement off of the value that the line is pointing to, which reads 30°. 
  6. We’re done!

Ready to give it a go?

Now, it’s your turn! We’re confident that you now know the basics to angles and angle measurement. Now, it’s time to practise. 

Don’t be afraid to try and fail. It’s all part of the process! Remember that practise makes perfect, and know that you’re just a few sessions away from acing that next maths exam. You’ve got this!

Practice questions

Click to reveal the answer.

The answer is 180 degrees.

Measuring angles 8

The answer is 90 degrees.

Measuring angles 9

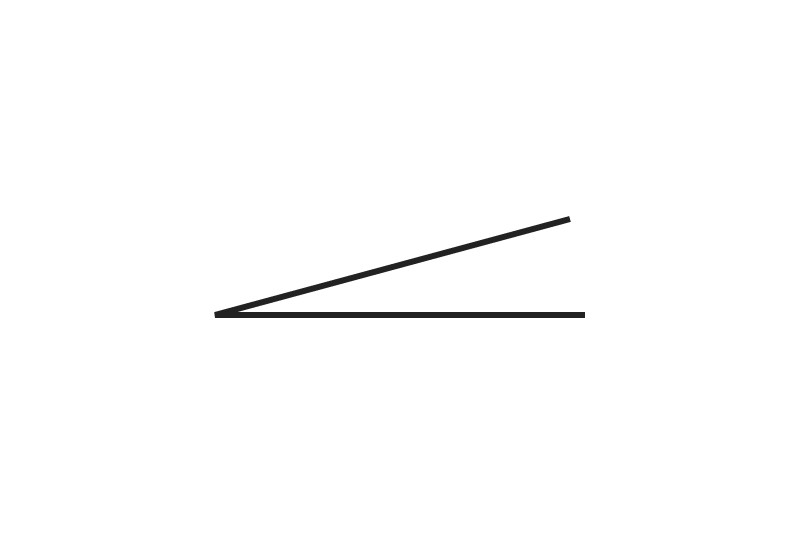
The answer is 15 degrees.

Measuring angles 10

The answer is 150 degrees.

Measuring angles 11

The answer is 70 degrees.

Measuring angles 12

Answers

Doodle-Blog-NumberIcons_1

The answer is 180 degrees.

How did we get here? 

  1. Before we begin measuring, we recall angle types. Does this angle match any specific angle (such as a right angle or a straight angle)?
  2. This angle appears to be a straight angle, which is an angle designation that can only be given to angles that have a measurement of 180°.
  3. We check our work, aligning the protractor’s midpoint at the vertex of the angle.
  4. We then align the flat base line of the angle with the “0” mark on the protractor.
  5. We read the measurement off of the value that the line is pointing to, which reads 180°.
  6. We’re done!
Doodle-Blog-NumberIcons_2

The answer is 90 degrees.

How did we get here? 

  1. Before we begin measuring, we recall angle types. Does this angle match any specific angle (such as a right angle or a straight angle)? 
  2. This angle appears to be a right angle, which is an angle designation that can only be given to angles that have a measurement of 90°.
  3. We check our work, aligning the protractor’s midpoint at the vertex of the angle.
  4. We then align the flat base line of the angle with the “0” mark on the protractor. 
  5. We read the measurement off of the value that the second vertical line is pointing to, which reads 90°. 
  6. We’re done! 
Doodle-Blog-NumberIcons_3

The answer is 15 degrees.

How did we get here?

  1. Before we begin measuring, we recall angle types. Does this angle match any specific angle (such as a right angle or a straight angle)?
  2. This angle appears to be an acute angle, which is an angle designation that can only be given to angles that have a measurement of less than 90°.
  3. We check our work, aligning the protractor’s midpoint at the vertex of the angle.
  4. We then align the flat base line of the angle with the “0” mark on the protractor.
  5. We read the measurement off of the value that the line is pointing to, which reads 15°.
  6. We’re done!
Doodle-Blog-NumberIcons_4

The answer is 150 degrees.

How did we get here?

  1. Before we begin measuring, we recall angle types. Does this angle match any specific angle (such as a right angle or a straight angle)?
  2. This angle appears to be an obtuse angle, which is an angle designation that can only be given to angles that have a measurement of more than 90° but less than 180°.
  3. We check our work, aligning the protractor’s midpoint at the vertex of the angle.
  4. We then align the flat base line of the angle with the “0” mark on the protractor.
  5. We read the measurement off of the value that the line is pointing to, which reads 150°.
  6. We’re done!
Doodle-Blog-NumberIcons_5

The answer is 70 degrees.

How did we get here?

  1. Before we begin measuring, we recall angle types. Does this angle match any specific angle (such as a right angle or a straight angle)?
  2. This angle appears to be an acute angle, which is an angle designation that can only be given to angles that have a measurement of less than 90°.
  3. We check our work, aligning the protractor’s midpoint at the vertex of the angle.
  4. We then align the flat base line of the angle with the “0” mark on the protractor.
  5. We read the measurement off of the value that the line is pointing to, which reads 70°.
  6. We’re done!

Sign up for the DoodleMaths app today!

Turn maths into an adventure when you sign up for DoodleMaths.

Click here to get started for free!

FAQs about measuring angles

We understand that diving into new information can sometimes be overwhelming, and questions often arise. That’s why we’ve meticulously crafted these FAQs, based on real questions from students and parents. We’ve got you covered!

Use your protractor and place the midpoint at the vertex of your angle. Align the base line or ray with the “0” mark, and determine what class of angle it is (i.e., acute, obtuse, right, straight). Then, follow the second line of the angle and record where it is pointing to on the protractor.

Many find that the easiest way to measure angles is to use a protractor. 

A right angle is an angle that is exactly 90 degrees. 

A straight angle appears as a flat line and is an angle that is no more or no less than 180 degrees. 

Group 208

Parents, sign up for a DoodleMaths subscription and see your child become a maths wizard!

Lesson credits

Christina Levandowski

Christina Levandowski

Christina has written for hundreds of clients from small businesses to Indeed.com. She has extensive experience working with marketing strategy and social media marketing, and has her own business creating assets for clients in the space. She enjoys being an entrepreneur and has also started pursuing investment opportunities as time permits.

jill padfield

Jill Padfield

Jill Padfield has 7 years of experience teaching mathematics. She is currently working as a Business Analyst, working to improve services for Veterans while earning a masters degree in business administration.

Christina Levandowski

Christina Levandowski

Christina has written for hundreds of clients from small businesses to Indeed.com. She has extensive experience working with marketing strategy and social media marketing, and has her own business creating assets for clients in the space. She enjoys being an entrepreneur and has also started pursuing investment opportunities as time permits.

jill padfield

Jill Padfield

Jill Padfield has 7 years of experience teaching mathematics. She is currently working as a Business Analyst, working to improve services for Veterans while earning a masters degree in business administration.

Login

Are you a parent, teacher or student?

Get started for free!

Are you a parent or teacher?

Maths information pack

We ask for your contact info so we can send our info pack directly to your inbox for your convenience

Exam prep information pack

We ask for your contact info so we can send our info pack directly to your inbox for your convenience

Case studies information pack

We ask for your contact info so we can send our info pack directly to your inbox for your convenience

Information pack

We ask for your contact info so that our Education Consultants can get in touch with you and let you know a bit more about Doodle.

Student Login

Which programme would you like to use?

If you’d like to use Doodle’s browser version, please visit this page on a desktop.

To log in to Doodle on this device, you can do so through our apps. You can find out how to download them here: